Do you want to make a family history timeline? In this post, I will walk you through the steps for how to make one using Microsoft Word.
A family history timeline is a great way to visually display the important events that have occurred in your family's history. A timeline is an opportunity to creatively tell your family's story.
Plus, it's just a great way to make sense of all of the genealogy information that you have about your ancestors.

Whether you need to make a timeline of your family's journey for a school project, or you want to include a timeline of your ancestors in your family tree work, you will find this tutorial easy-to-follow and adapt to your particular need.
What should the focus of your family history timeline be?
You can use your timeline to illustrate an an aspect of your family tree or show important events in your family's history.
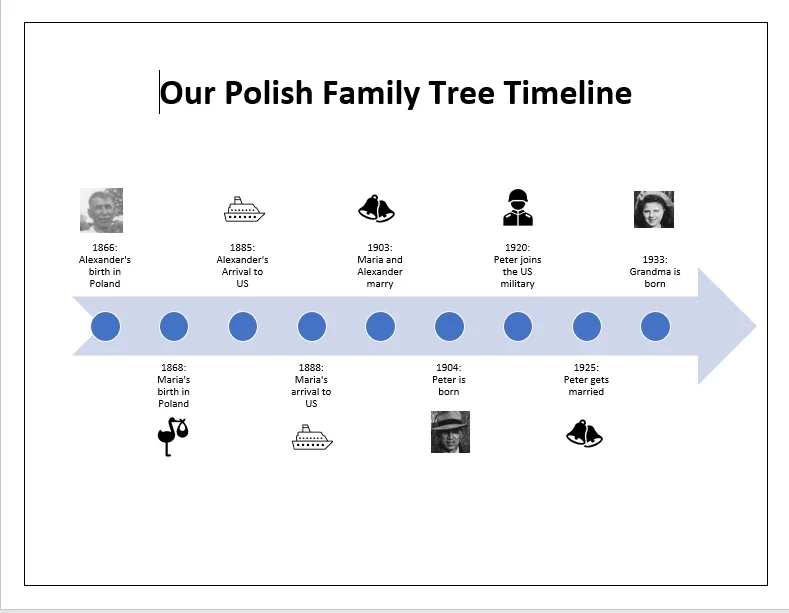
I chose an example from my own family tree to use for this blog post. The focus of my timeline is my Polish ancestors on one line of my family tree.
My timeline begins at my Polish great-great grandfather's birth in Poland and ends with the birth of my grandmother.
The beginning and end dates of your timeline, as well as the details that you include on your timeline, are completely up to you.
The way that you make your timeline depends on what you would like to illustrate.
In my timeline, I wanted to show the journey of my ancestors from Poland to the US. My great-great grandparents didn't meet in Poland - they met in New Jersey.
My family is familiar with my grandmother's story, but many family members don't know much about my grandmother's Polish ancestry.
I thought that a timeline like this is a simple and easy-to-understand way to illustrate her Polish roots.
Where to get the information to make your family history timeline?
To make my family history timeline, I used information that I have gathered from information that I found while researching to build my family tree. I build my family trees on Ancestry because it is free to do so.
There are lots of free places to find genealogy records, such as familysearch.org.
Someone in your family may have already built a family tree that they could share with you. Otherwise, you could also consider conducting family history interviews to gather information about your recent ancestors from your relatives.
How to make a family history timeline using Microsoft Word
While there are many ways to make a family tree timeline, I chose Microsoft Word for this blog post because it is a software that many of us have access to. It is also very simple to create an attractive timeline using this program.
I made the simple timeline for this post in less than 15 minutes, for example. I'm considering making similar timelines for all recent lines in my family tree to include in a family tree compilation I want to give to my sisters for Christmas this year.
Below are the steps you should take to make your own timeline.
Open a new, blank Word document
The first thing that you should do is open a new, blank Word document. If you desire, you could also follow the steps below to insert your timeline into an existing document.
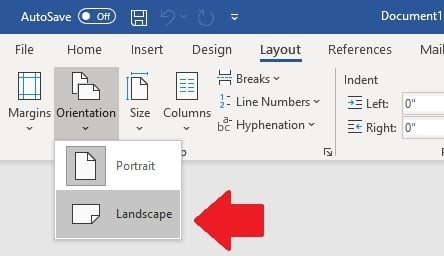
I recommend creating a timeline on a page that will be displayed in the landscape orientation versus the portrait orientation. This is because you can create a longer and more thorough timeline if you choose landscape.
To change the orientation of your document, simply click "Layout" on the top menu, and then "Orientation". Choose Landscape as the preferred layout:

Insert a Basic Timeline into your Word document
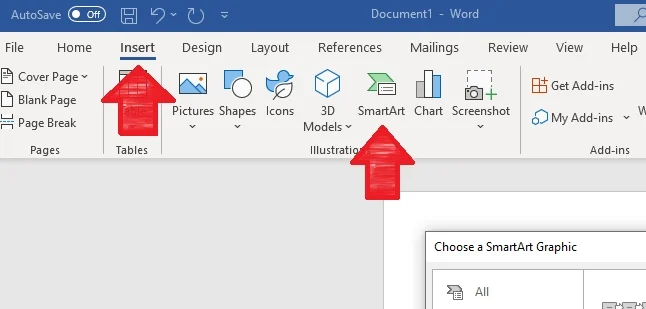
The next step is to insert a basic timeline into your Word document. You can find the basic timeline under the "SmartArt" options.
SmartArt is located under the "Insert" menu. First, click "Insert" and then click "SmartArt", as show with the arrows below:

There are lots of different SmartArt options, but we are only looking for the Basic Timeline. To find this, click on the "Process" SmartArt types.
Then, choose the Basic Timeline, which is currently the 16th option. It should look similar to the image below:
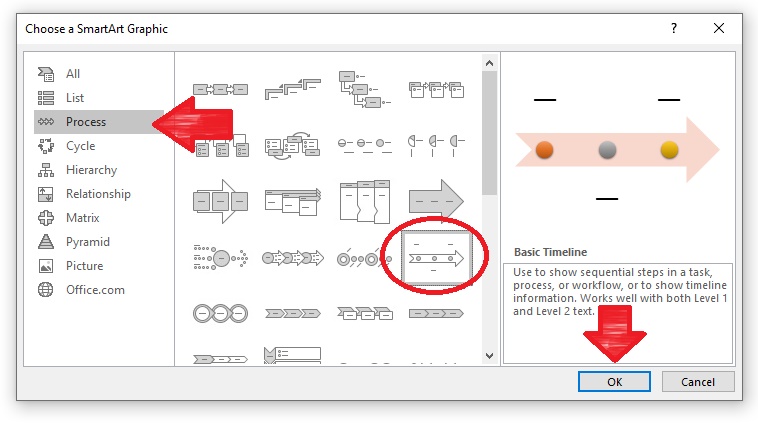
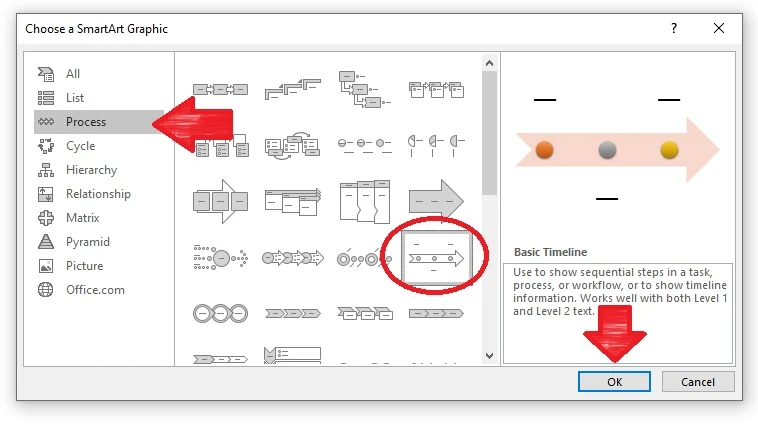
Once you have found the Basic Timeline, be sure to click "OK" to insert it into your document.
We are almost done setting up the basics of our timeline! I told you it would be easy.
Enter in the individual details you want to include in your family history timeline
You should now see a black basic timeline in your document. We now need to enter in the family history details that we would like to include on our timeline.
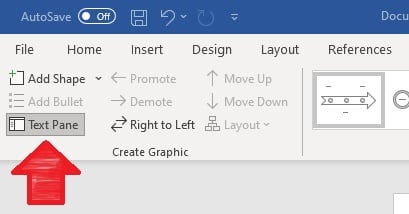
The fastest way to do this is to access the "Text Pane" for your SmartArt basic timeline. The text pane can be access by clicking on the option on the top menu, as indicated by the red arrow in the image below:

When you open up the text pane for your SmartArt, each bullet point represents a point on your timeline. As you enter in more bullet points, the timeline will automatically exapnd.
The text on the original timeline looks too big to include very much information, but as you add bullet points, the timeline will adjust to the amount of information that you have added.
Once you add in all of your bullet points, your timeline will have expanded. Below is what my text pane contained for my finished timeline:
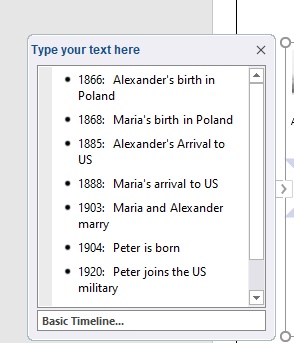
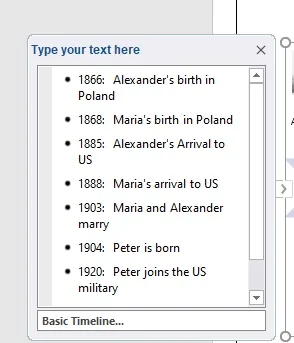
My family history timeline was now expanded to be able to include all of the details that I wanted to make sure appeared. If it doesn't look exactly right, don't worry - we'll make some adjustments below.
Move your timeline to be in the center of your page
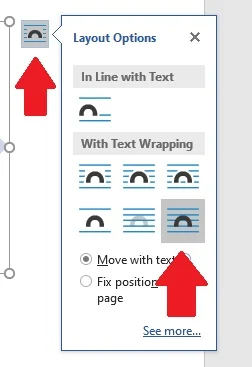
I like to adjust my images so they stay wherever I put them on the page. To do this, click the little icon next your SmartArt timeline.
Then, choose the last layout option, as show in the image below:

Add images to your family's timeline
You can make your timeline more beautiful by adding images and icons to represent important events in your ancestor's lives. For example, I included photographs when available.
For events like marriages and births, I used the icons that come with Microsoft Word.
I recommend adding images and icones after you have decided exactly where you want your timeline to be on the page. In addition, be sure that you have added all of the details to the timeline.
This is important because if you make changes to the text content of your timeline, you might find that it shifts. If you placed your images in a particular place due to the relationship of the image to the text nearby, it might not look how you want it to.
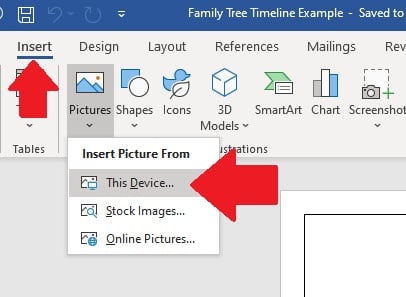
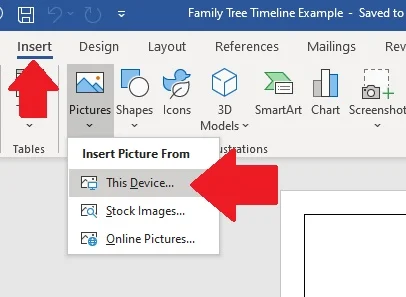
To insert a photograph into the timeline, access the "Insert" menu, and then choose "Image
I chose small photographs of only my ancestors' faces to include on the timeline. You can choose the photographs that you prefer based on the space available.
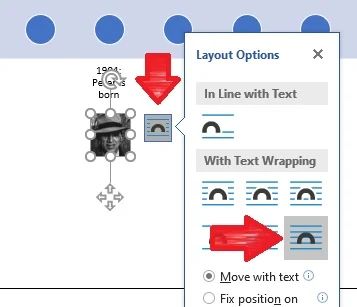
You will likely want to adjust the image layout for each individual image that you insert into your timeline. This way, you can place the image exactly where you want it to be on your timeline.
To do this, click the little layout icon next to the picture that you insert. You can also resize the image by dragging the corners of the image to make it bigger or smaller.
The image below shows exactly where to click (red arrows) to make your image "moveable" via dragging your mouse:

Once you get your images lined up, you are done with your family history timeline. This is what my timeline looked like, once I included a title at the top of the page:

To share your timeline with others, you could export it as a PDF document to prevent changes from being made.

Conclusion
I hope that this post has helped you understand how to determine the focus of your family tree timeline as well as exactly how to make your timeline easily using Microsoft Word.
If you have any questions about something that you read in this post, or if you would like to add your own tips about making a timeline, please join us in the discussion below.
Thanks for reading this post today!
Joseph Filip
Friday 14th of May 2021
What a great post on a tool that I already have but did not know about! Thank you, Mercedes. I have some questions. First, is it possible to make a timeline that will extend over several pages? If not, then I suppose I could do a timeline in sections of 1 page each. Next, as I was reading your explanation I started wondering... Have you ever tried to do a timeline that shows, say, your father's family above the line, and your mother's family below? The time line would show some of the unlikely events that eventually brought them together. Or, maybe print the paternal events in blue and maternal events in red, letting the program automatically do the alternating/spacing. I haven't even tried a simple timeline to get my feet wet and learn how it all works. Knowing you, you have made all kinds of fancy manipulations. Sometimes you have to "trick" the package programs into behaving the way you want them to! Thanks again, Mercedes!