Have ever wondered whether you can uploaded and preserve audio files to your Ancestry family tree? This is definitely possible, and in this post, you'll learn how to do it.
More than a decade ago, I lost my grandfather. He was the most influential person in my life up until that point, and I desperately miss our conversations.
A few months ago, I realized something that really made me feel pretty sad. No matter how hard I try, I can't remember what his voice sounded like.
Sure, I can't guarantee that had the Ancestry family tree app existed ten years ago I would have had the foresight to make recordings of conversations with my grandfather. However, I know that today - right now - I can make recordings of some of my other relatives, and possibly, so can you.
You might already have some types of recordings that are perfect for preserving in this manner.
Why would we want to upload audio to Ancestry?
Uploading our recordings to Ancestry makes it easy to organize our audio memories and share them with relatives. In addition, these audio recordings could be preserved for many generations to come.
Many of us have vast collections of photos, audio, and video just sitting on our computers. By uploading some of this media, in this case our audio files, to the "cloud" on Ancestry, we give these files a chance to see the light of day again someday.
What types of audio recordings should we preserve?
We can share recordings of ourselves or a relative telling a story, interviews, conversations about family history, songs that our family member plays or sings, among many other types of recordings.
Of course, we should only make recordings of people with their permission (laws on this vary by state and country), and we should not upload audio files that are copyrighted, which might be an issue if someone else made the recording.
Now, let's jump into the instructions for how to upload the audio files to your tree.
Two ways to upload audio to Ancestry family tree
There are two main ways to get audio files into your family tree. The desktop computer method is pretty easy, as long as you already have the audio file on your computer.
The second way is best if you don't already have your audio file and you plan to use your smartphone as a recording device. This is also the best way if you don't regularly have access to a computer and usually use Ancestry on your phone.
First, I'll show you the desktop method. Then, you will find instructions for how to do this on your phone.
Upload audio directly on the desktop website
If you have access to a computer and your audio file is on your computer, or easily accessed from your computer, the easiest way for you to get the audio files onto your Ancestry tree might be from the main Ancestry website.
Navigate to your family tree like you usually do, and pick the person whose voice/music you have recorded for this purpose. Once you are on their profile, click the "Gallery" tab under their name.
Then, click the blue "Add Media" button to the right of the screen, and choose "Upload audio" from the drop-down menu:

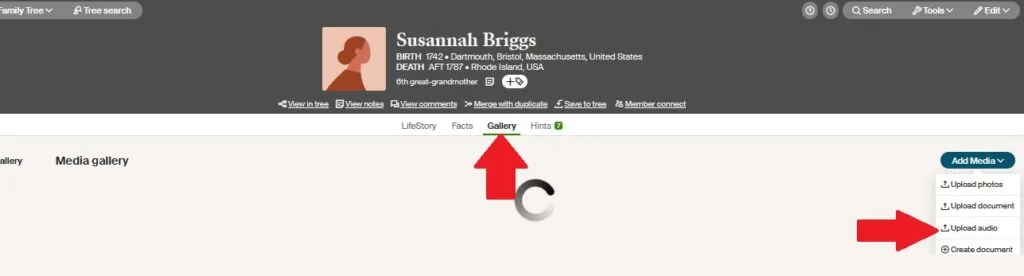
The red arrows in the image above indicate the "Gallery" tab and the "Upload audio" option from the drop-down menu that appears once you press the "Add Media" button.
Upload audio files from your phone using the Ancestry app
If you do not have a computer, or it is easier to get access to the audio from your phone, or if you are going to make a recording directly from your phone to upload to the Ancestry site, the instructions below apply to you.
Download the Ancestry app to your phone
The first step to having the ability to upload audio files is to download the Ancestry app to your smartphone. There are several benefits to having the Ancestry app on your phone, such as having the ability to work on your tree from anywhere, or see a map of important locations and events in your family tree.
You can download the Ancestry app from the Apple App Store or the Google Play App Store. This is typically done directly from the store app on your phone.
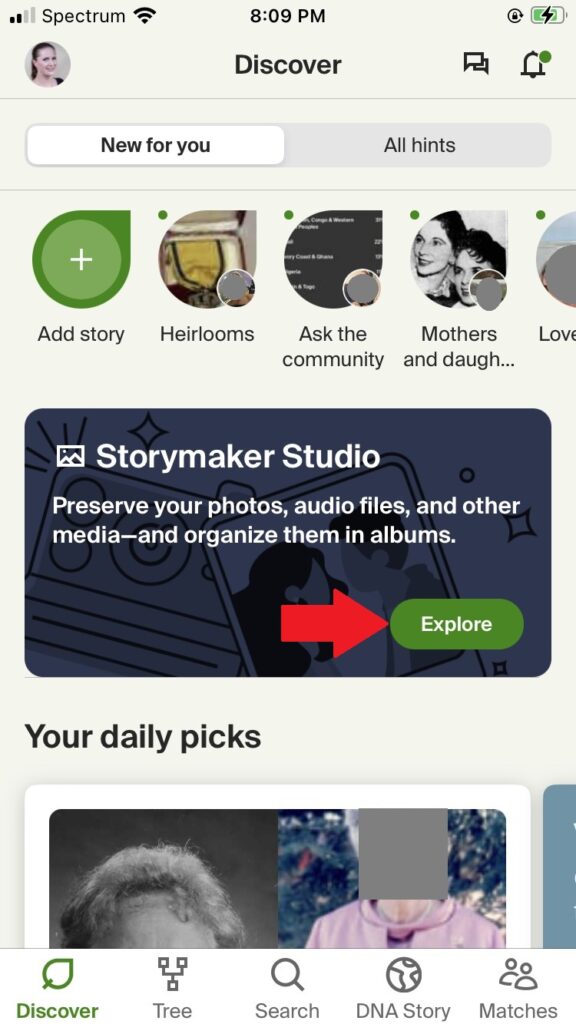
Open the Storymaker Studio
Once you have downloaded the app and logged into your Ancestry account, the next step is to access the Storymaker Studio. Currently, this is right on the home screen of the app and is the green button that says "Explore" by the Storymaker studio image.

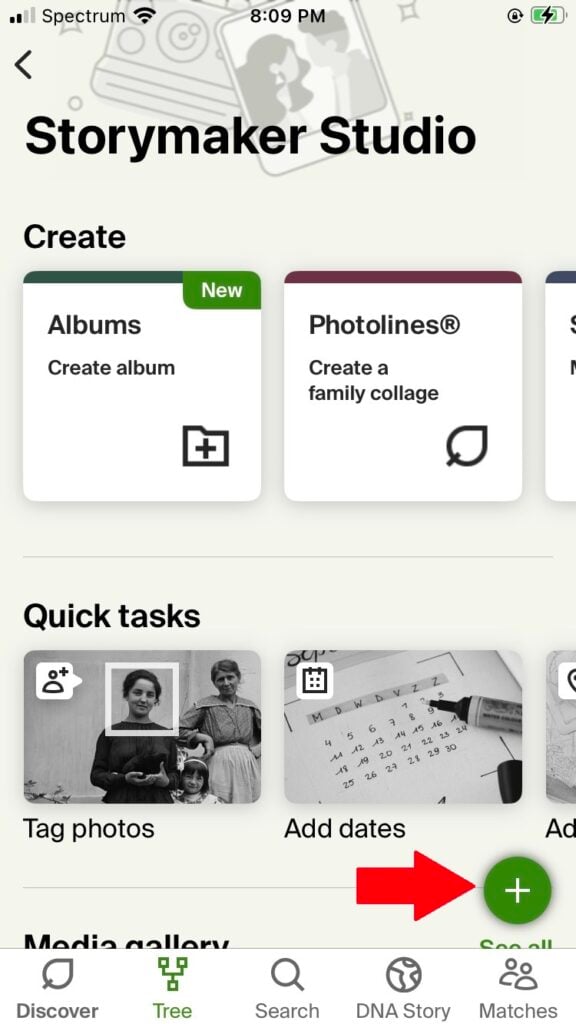
Press the "plus" button
The next step is to press the "plus" button that appears. This button is to add media, such as audio and photos, to your Ancestry media gallery to be used in stories and accessed on your tree.
The "plus" button is a green button in the bottom right of the screen, as seen in the image below:
Press the Upload audio button
Then, choose the audio the option to upload audio. This is currently the last option on the menu:
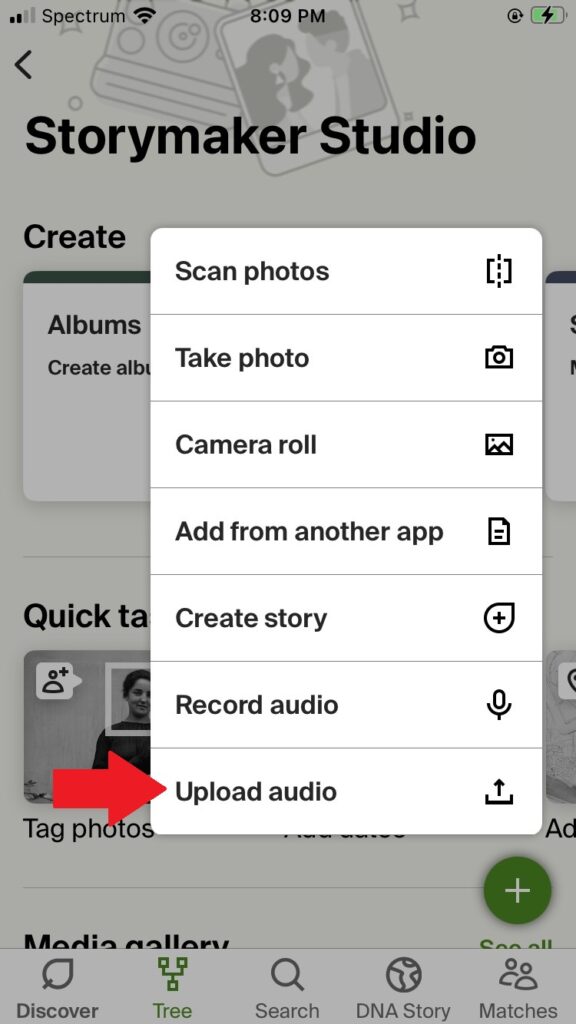
Alternatively, you can record right into the app. If you are in a time crunch and really want to just grab a short recording, this is a good option, but you may be prompted to give the Ancestry app access to your microphone and storage.
Select audio file
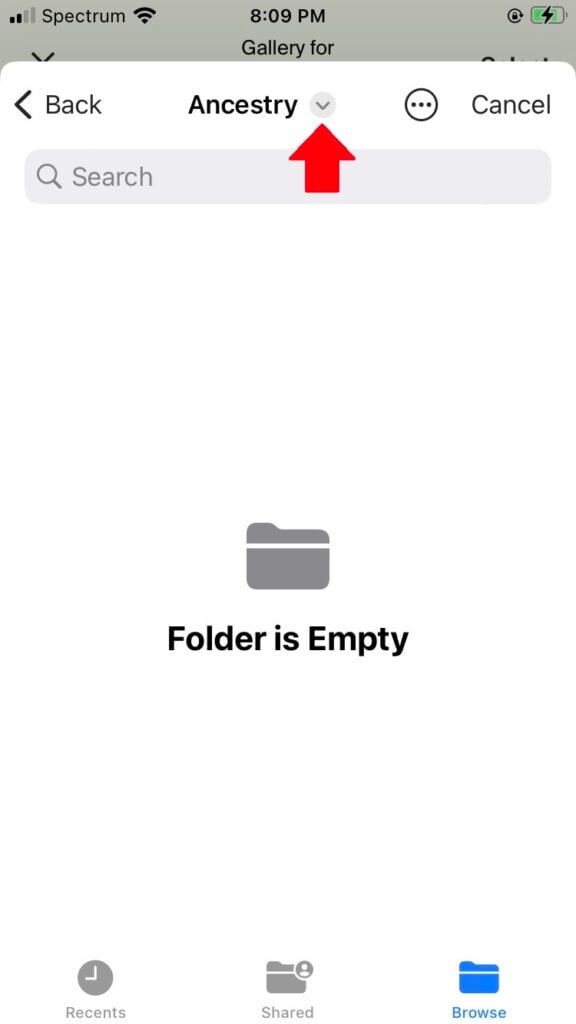
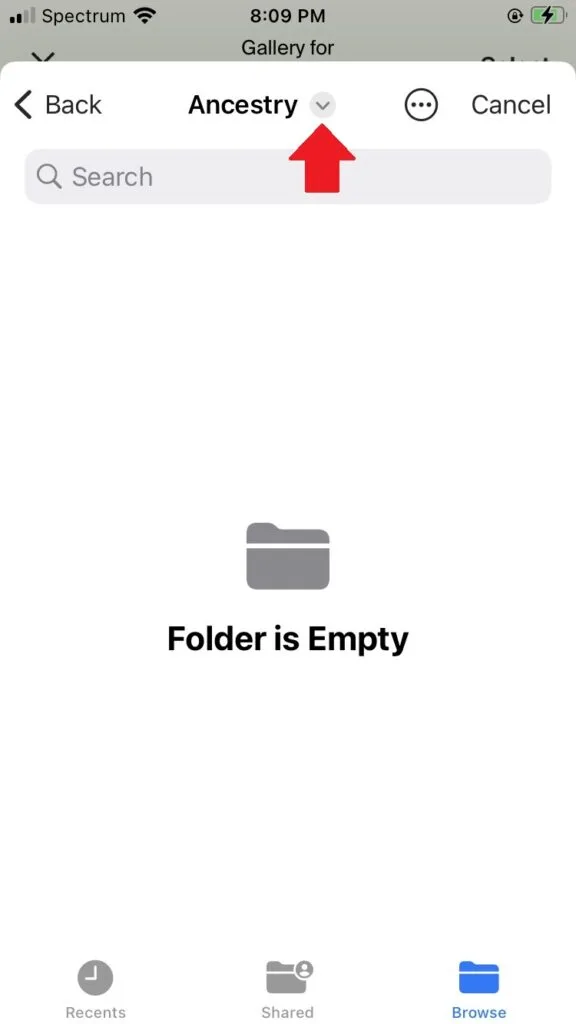
The next step (if you are not recording directly in the app) is to select the file that you would like to upload. I found that this step was a little confusing because my phone defaulted to the Ancestry folder in its storage, but there was nothing there.
So, I clicked on the little down arrow (the red arrow is pointing to it in the image below) to change folders on my phone. I was able to switch to my main phone storage and find my audio file.
Add details about your audio file
Once I uploaded the file, I clicked the edit button to edit the details about my file. The file was called "Interview with Dad", and I could change this title on my tree, perhaps to my dad's full name so that way other people would know who "dad" was.
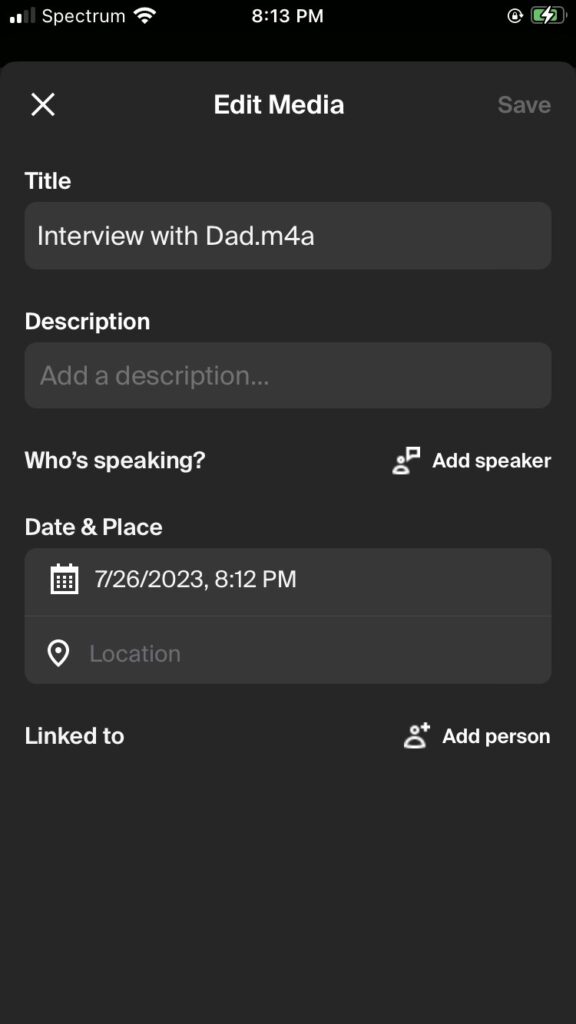
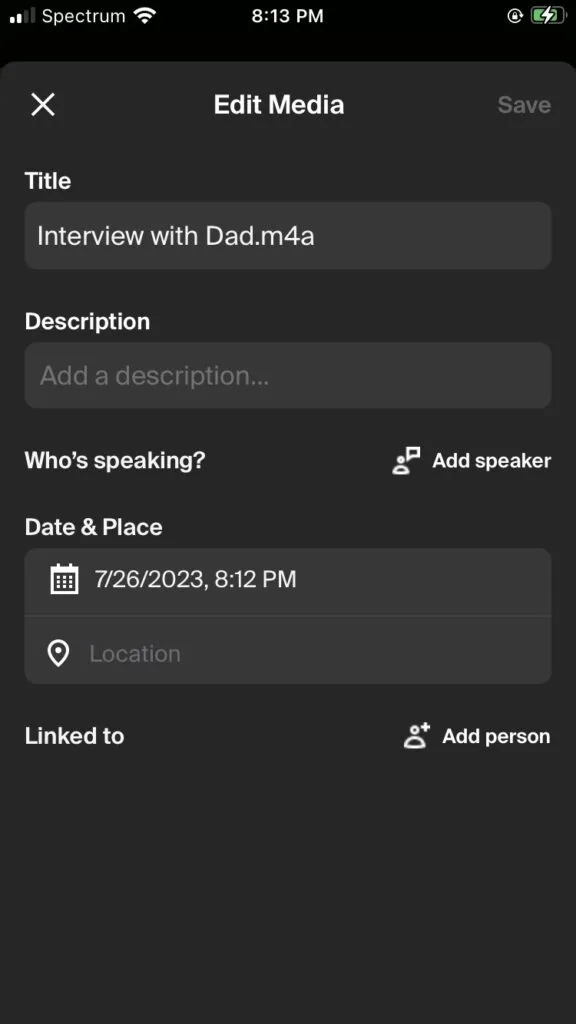
I could also add details like the date, who is speaking in the recording, including adding multiple speakers if applicable, and link this media to people in my tree. It is important to go through the process of linking the file because if you don't link it to a specific person, the file will be in your tree media gallery, but it won't show up for specific people.
Conclusion
I hope that this post has helped you learn the steps to take to upload your audio files to your Ancestry tree from the app. Plus, my hope is that you are able to see the importance of preserving audio recordings of our family members for the future.
If you have any questions about something that you read in this post, or if you would like to share your own ideas about the types of audio we could consider uploading to our Ancestry trees, please join in the discussion below.
Thanks for reading today!