Do you want to know how to delete your DNA data from Gedmatch? If you want to know the easy steps to follow, you will find them here.
In addition, you will also learn whether Gedmatch stores your actual DNA. If you have a family tree (GEDCOM) on the site, you will see how to delete that, too.
I should begin this article by being very clear: I am a huge fan of Gedmatch. I doubt I will ever delete my DNA from the site!
Even so, there are good reasons that someone might want to remove their DNA file from Gedmatch. For example, you might have privacy concerns and want to limit the places where you have uploaded your genetic data.
Alternatively, you might have uploaded DNA on behalf of a family member. Perhaps they have decided that they would no longer like to have their DNA information online.
No matter the reason, I hope that you find this article helpful and that you are able to decide whether to delete your data, as well as follow the steps to do so.
(But if your reason for deleting is that you don't understand how to use the site, this post might help you: Gedmatch Tutorial for Beginners)
Does Gedmatch store your DNA?
It is very important to note that Gedmatch does not store your actual DNA on their servers. The DNA information on their site was obtained from a "raw DNA" file that you downloaded from your DNA testing company website to upload to Gedmatch.
The raw DNA file does not contain your actual DNA. If you open up your raw DNA file, it contains a complicated list of combinations of letters and numbers that will not make sense to most humans.
Additionally, the DNA file does not contain information about your entire genome. DNA testing companies currently only test a small percentage (less than about 10%) of locations in our DNA.
In other words, our DNA file is not the same as our complete DNA - it doesn't contain enough information.
Steps to delete DNA data from Gedmatch
It is very easy to delete your DNA data from Gedmatch. If you have more than one DNA kit uploaded to the site and you would like to delete them all, you must delete them one-by-one.
The steps to delete your DNA kit from Gedmatch are described below.
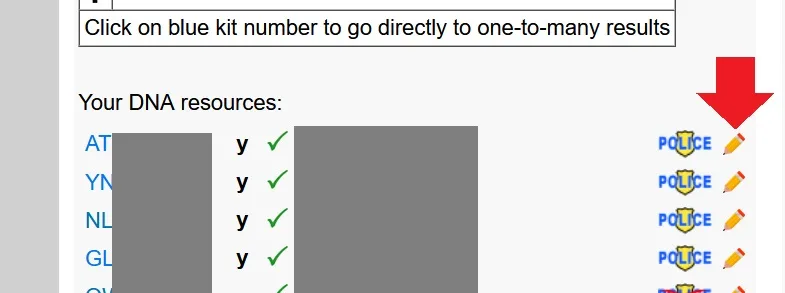
Click the pencil icon to the right of the kit you would like to delete
The first step is to click on the pencil icon that is located to the right of the name associated with the DNA kit that you would like to delete. Your DNA kits can be seen on the main Gedmatch dashboard page, which is what you see when you login to the site.
The image below shows you exactly where the pencil icon can be seen. This is also the same place to click in order to access the kit settings, which can help you change information such as the name and other information associated with the DNA kit:

You are almost done - there are just a few quick steps to take to finish the process of deleting your kit.
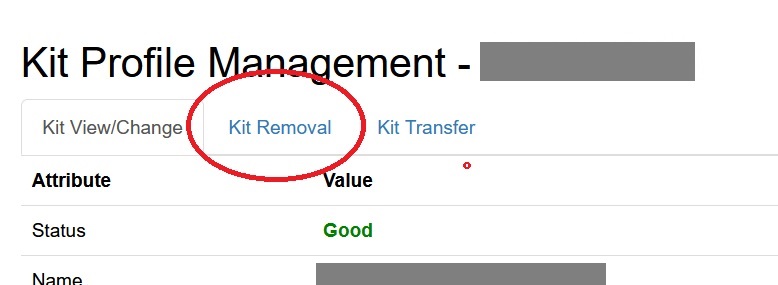
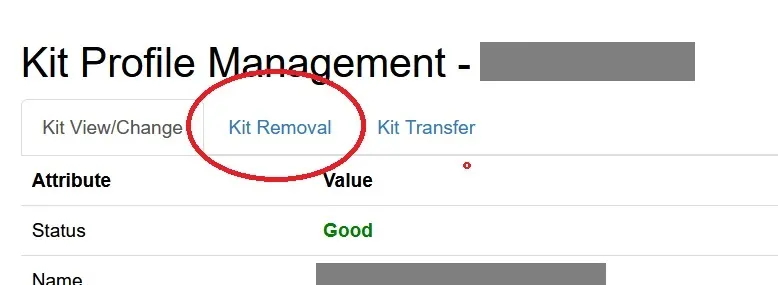
Click the Kit Removal tab
Once you click the pencil icon, you will be taken to a new page. On this page, you must click the "Kit Removal" tab in order to see the option to delete your DNA kit from Gedmatch:
You are less than 30 seconds from being done with this process - stay with me!
Enter your password and click the delete button
On this new screen, you must enter your password in order to access the delete function. After you have entered your password, click the DELETE button on the right side of the screen, as indicated in the image below:
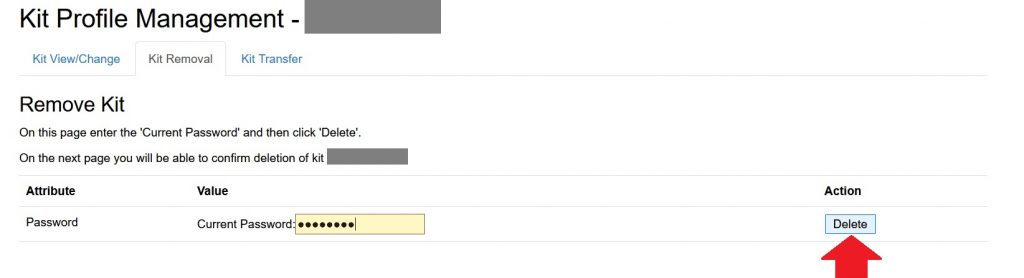

The final step, described below, is simply to confirm that you really do want to delete your DNA kit.
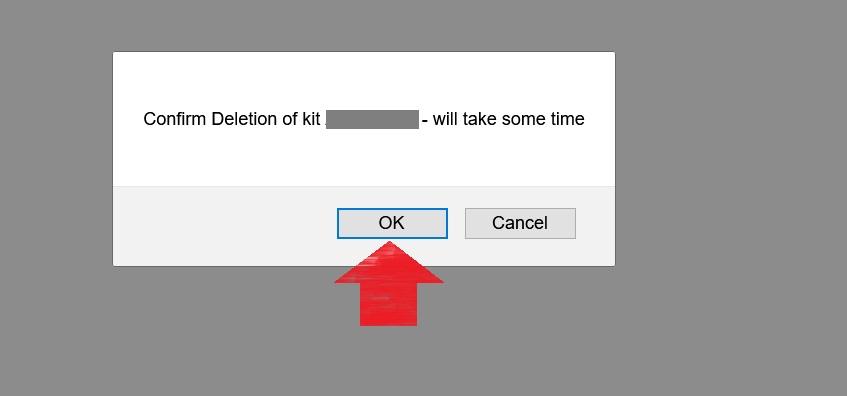
Confirm that you would like to delete your DNA kit from Gedmatch
The final step is to press the "OK" button, essentially confirming that you do want to delete your DNA kit. This is permanent, as your DNA kit cannot be restored once you confirm that you would like to remove it.

Once you delete your DNA kit, you will no longer show up as a DNA match to other users of Gedmatch. In addition, you will not be able to use this DNA kit with the various tools available on the site.
How to delete your family tree from Gedmatch
There are many reasons that you might want to delete your family tree (GEDCOM) from Gedmatch. The most common reason is wanting to delete the current GEDCOM to be able to upload a new, updated version of the family tree.
The steps to delete your GEDCOM are below. You will need to be sure to log in to your Gedmatch account before following these steps, of course.
Scroll to the section right below your DNA resources
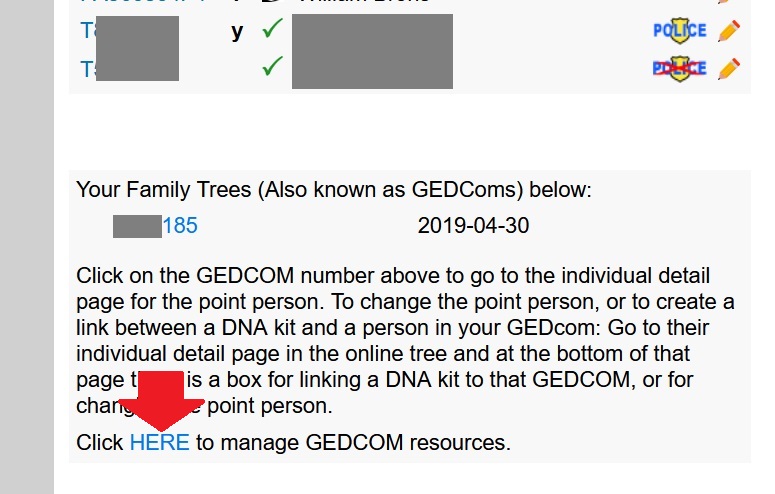
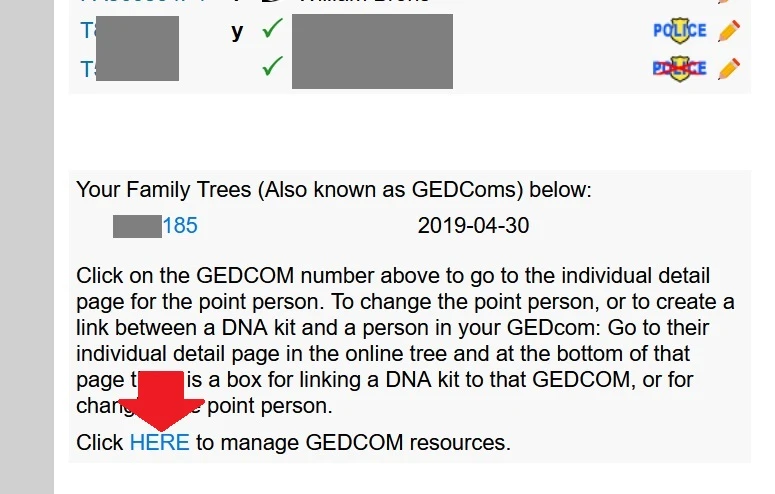
The family trees (GEDCOMs) that you have uploaded to Gedmatch can be found directly below your DNA resources. DNA Resources are your kit number and name, which you can see right from your Gedmatch dashboard.
Click on the blue "HERE" link in order to access the page where you can manage your GEDCOM resources:
You will need to click on the red "X" right next to the GEDCOM that you would like to delete, as shown in the image below:

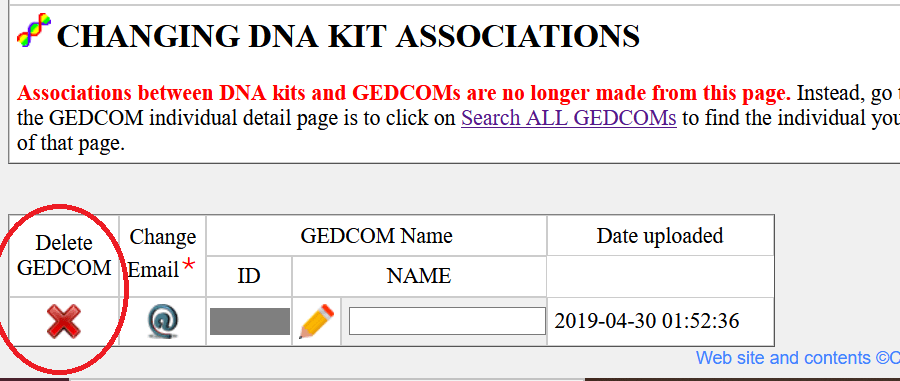
Once you click the red arrow, it will take you to a new screen where you must confirm that you would like to delete this GEDCOM. You will also have the option to cancel.
Once you click the linked text that says "YES, delete GEDCOM. I understand that this is a permanent deletion." your GEDCOM will be deleted.
After you have deleted your GEDCOM, it will be permanently deleted and you will not be able to access it on the site anymore. If you upload a new GEDCOM, you will be assigned a brand-new GEDCOM number.

Conclusion
I hope that this post has helped you understand the nature of the data you have stored with Gedmatch, whether you should delete it, and exactly how to delete it if you decide to do so.
By the way, if you ever change your mind about using Gedmatch or if you deleted your data by accident, you can read this post to upload it again: How to do a Gedmatch Upload
If you have any questions about something that you read in this post, I would love to hear from you in the discussion below.
Thanks for stopping by today!