In this post, you will learn how to share your family tree on Ancestry. I’ll teach you two different ways to do it, so you can choose the best one for your situation.
Are you trying to decide whether to go through the steps of building your family tree on Ancestry? Or maybe you already built your tree, and are wondering how to share it with a relative?

Why would you want to share your tree?
A few months ago, my sister decided to do the Ancestry DNA test. Since both of our parents have already done the test, I don’t think that we will learn anything new – other than that she is absolutely, positively, my father’s daughter.
Regardless, she has been very curious about which ethnicities will show up in her DNA. There is nothing quite like getting your DNA results back and seeing what your DNA is made up of.
Since my sister has not really been involved in researching our family tree, her natural question was whether my family tree would merge with hers once her results came back. The unfortunate answer is no.
It would be so wonderful if Ancestry would just recognize that she is my sister and place her right into my tree where she belongs. Wouldn’t that be fantastic?
We just don’t have the science/technology to do this quite yet.
Fortunately, it’s not hard to share your family tree with your family members who do the test. Making a new tree is so much work, and many people aren’t interested in putting in the time investment to make their own.
I’m still not sure, but I think my sister might be one of these people.
Even though she isn’t as interested in doing research as I am, I still want her to enjoy her DNA results to the max – so I am going to share my family tree with her.
This way, she will be able to be in ThruLines, have Common Ancestor Hints, and be able to figure out more easily how she is connected to her DNA matches.
And who knows, maybe she’ll catch the genealogy bug!?

Have you built your tree on Ancestry yet?
Are you still trying to decide whether Ancestry is the best place for you to build your tree? I love it, use it, and recommend it to all of my readers since it’s the best place to easily integrate online records into your family tree.
You can also attach your DNA results to your family tree to get additional information about your DNA results, and learn more about your ancestry.
You don’t need a subscription to build your tree, access it, or share it, but it is helpful to have a subscription when you are actively doing research and accessing documents (it makes it wayyy easier!!).
How to share your tree on Ancestry with someone else on Ancestry
Do you want to keep ownership of your tree, but allow your relative access within Ancestry’s website? Ancestry calls this “sharing” your tree.
If you choose to do it this way, you will be able to control how much access they can have, and whether or not they can edit your tree and add new people. Additionally, you can specify how whether they can see living people (privacy issues).
You can also delete their access to your tree at any time (but I know there is no drama in your family!).
How to do this: This is a super simple thing to do, but it can be tricky to find the place on your tree where you do it.
Here are the steps:
- You have to log in to your Ancestry account, and click on the tab on the top where it says “TREES”.
- A menu should drop down, and just choose the tree that you want to share access to.
- From within the screen where you can see your tree, in the top left corner below the menu, you will see a box that says “YOUR NAME Family Tree”. Immediately to the right of the name of your tree, you will see a little down arrow – click on that! This is what it looks like:
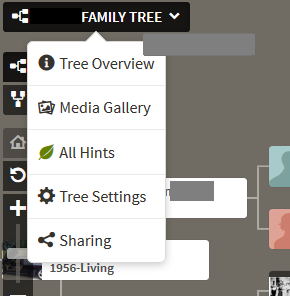
- A dropdown menu will appear. Choose “Sharing”.
- A box will pop up where you can share your tree with someone either using their username or their e-mail address. I usually just e-mail addresses. This is where you can choose their access level to your tree.
The default is to NOT let people that you share your tree with see living people in the tree. After you send the invite, a little message will pop up that reads: “You can use your tree settings to assign roles and manage invites.” Just click on that link and it will let you make adjustments as needed.
How to Download/export Your Ancestry Tree as a GEDCOM File For Sharing
Are you the super generous sharing type? If you think that your relative is interested in doing their own research, another good option is to actually give them a digital file.
This gives them freedom to add/change/delete at-will. It keeps you out of it (you might not want to be involved). It’s also a good way to make sure that information gets passed down and shared through the generations.
In my family, my great-grandmother had done a lot of work on the family tree. This file was shared with some of her grandchildren, and their children.
In some families, distance and generations can cause information to get lost – so you can avoid this by sending people your GEDCOM file.
Here are the steps:
- Log in to your Ancestry account, and click on the tab on the top where it says “TREES”.
- On the dropdown menu, choose the tree that you would like to export (that is what this process is called).
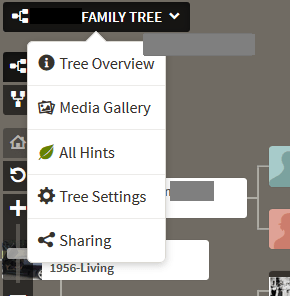
- On the right side of the name of your tree, you will see a little down arrow – click on it! This is what it will look like:
- Click on the “Tree Settings” option.
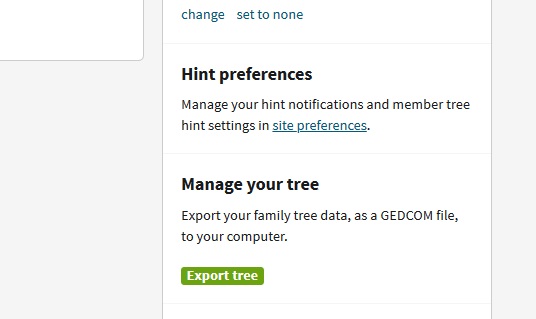
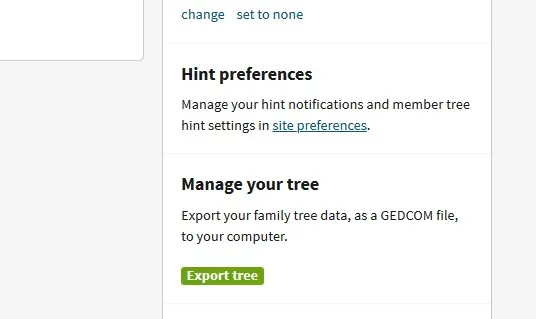
- When your tree settings page loads, you will see a green button that says “Export Tree”. Click on the button. Here is a quick screenshot of what it looks like:
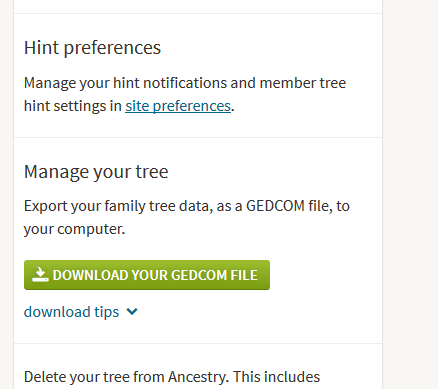
- Once you click on the button, Ancestry will start to generate a Gedcom file.
- Once it is finished, a green button will appear that says “Download Gedcom File”. Click on it, and choose “Save” when the box appears.
Here is a screenshot of where the button will appear (Note: It will say “Export Tree” until you click on it and the file is ready)

That’s it! These are super easy steps, and now you can easily show your family members what you’ve learned!
Conclusion
I hope that this post helped you learn more about how the different ways that it is possible to share your family tree with a family member. Do you have any questions about these steps or any other aspect of sharing your family tree?
Let me know here in the comments!
Thanks for stopping by.
Keith Mackey
Monday 27th of June 2022
I created a family tree for my mother-in-law on her personal ancestry.com account several years back. She is now in poor health living in a nursing home, so I copied the tree to a gedcom file and uploaded it to an ancestry account that my wife and I use. Now I would like to make my wife the owner of the tree in our account and make her the home person. Is there a way I can do this?
Maxine Olson
Sunday 9th of January 2022
No menu drops down when I click on Trees!
Alan Stone
Wednesday 5th of May 2021
The steps you've indicated no longer work for me. When clicking on "Sharing" in the drop-down menu I get an informational box that explains what 'sharing' a family tree is about and what it allows. I select the 'X" to close the box, see my previously added invitee list. Clicking on the '+Invite People' hotlink only brings up the aforementioned information box. No form for adding a new person is made available. I'm on a Mac running OS Catalina, 10.15.7.